Five steps and your invoices, payments and customers stay in sync — with your books clean from day one.
In the app: Settings → Billing & Payments → QuickBooks Integration → Connect. Intuit's official sign-in opens — log in with your QuickBooks Online credentials and authorize PureSynq. That's the whole connection; no API keys, nothing to copy.
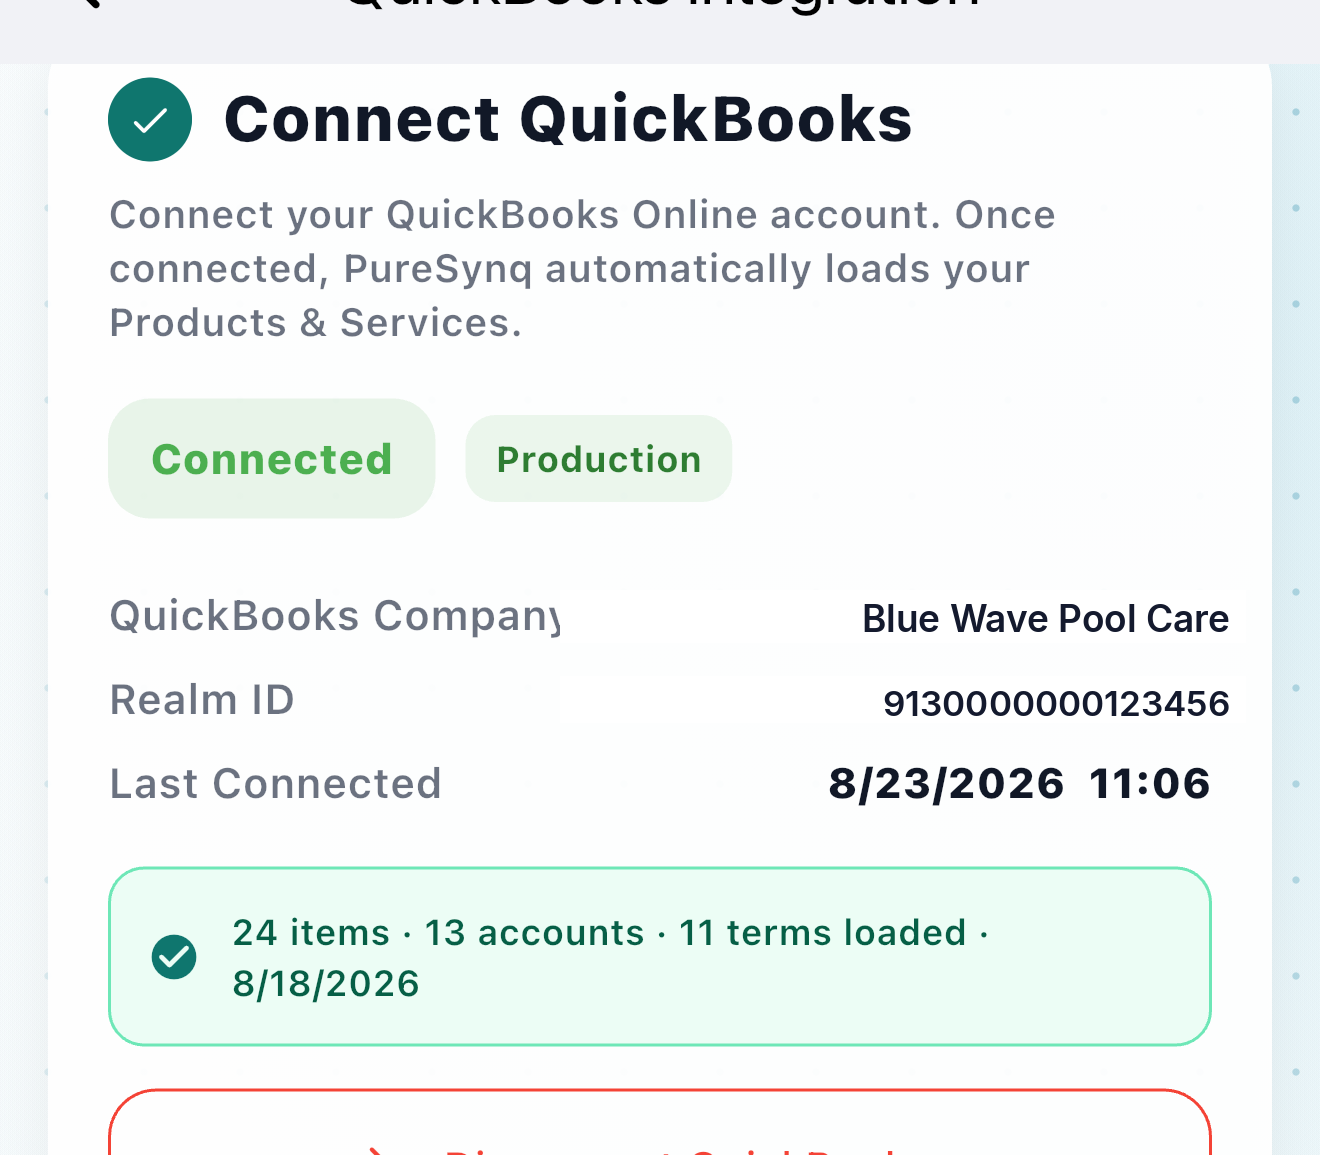
Back in PureSynq you'll see Connected · Production with your company name. PureSynq automatically loads your Products & Services, accounts and payment terms — you can see the count and date right on this card.
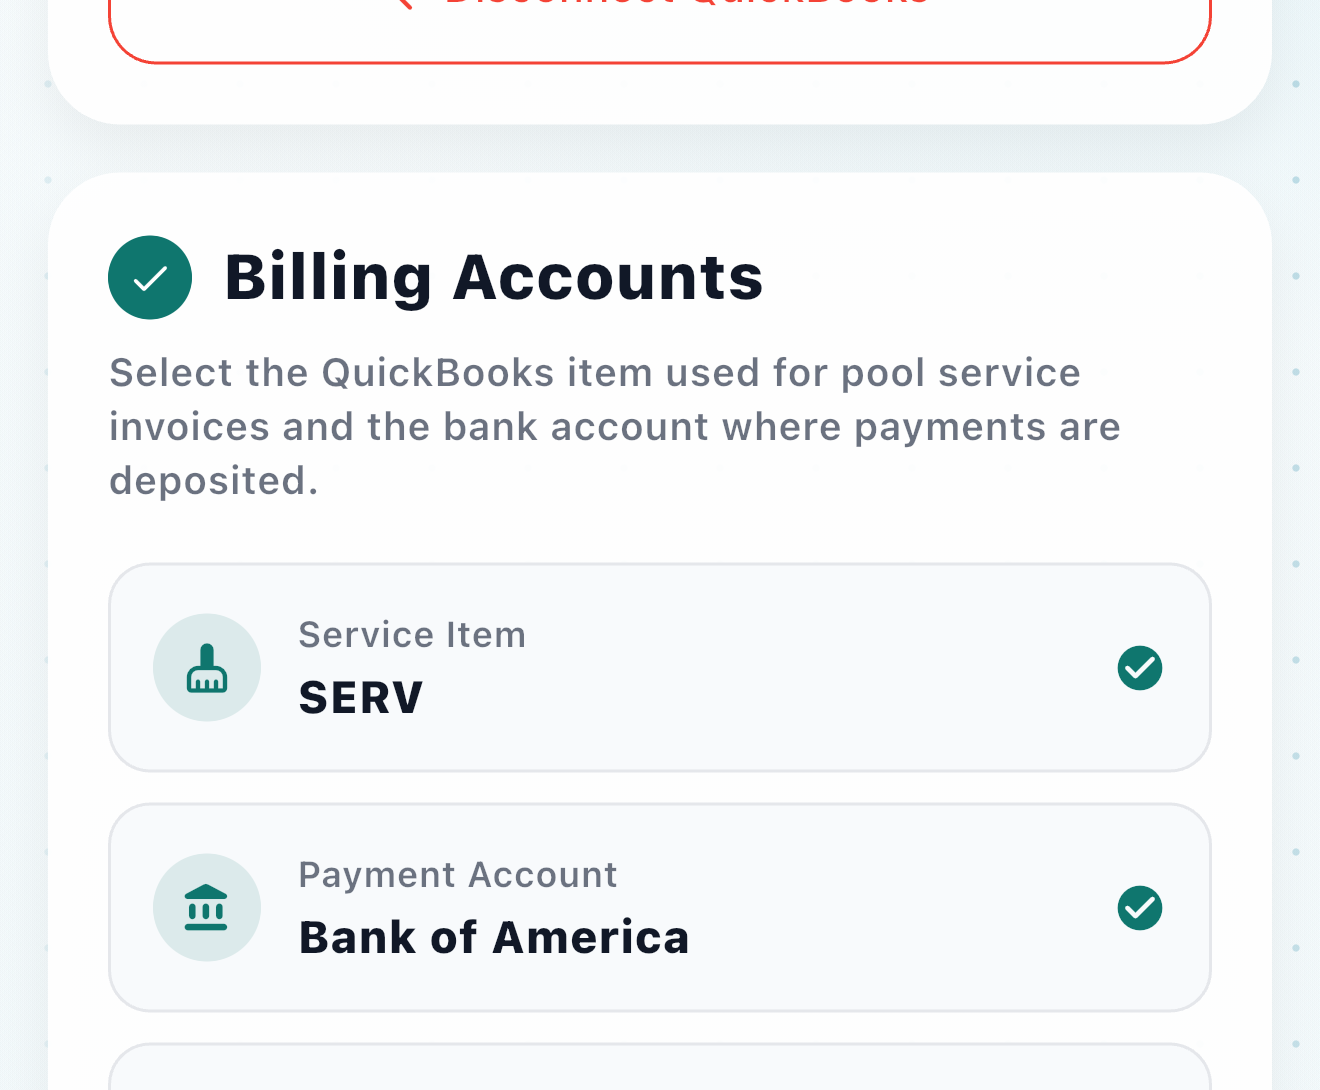
Three selections: the Service Item your pool service invoices use, the Payment Account where customer payments are deposited, and an optional Stripe Fees Account if you want card processing fees tracked as their own expense line in QuickBooks.
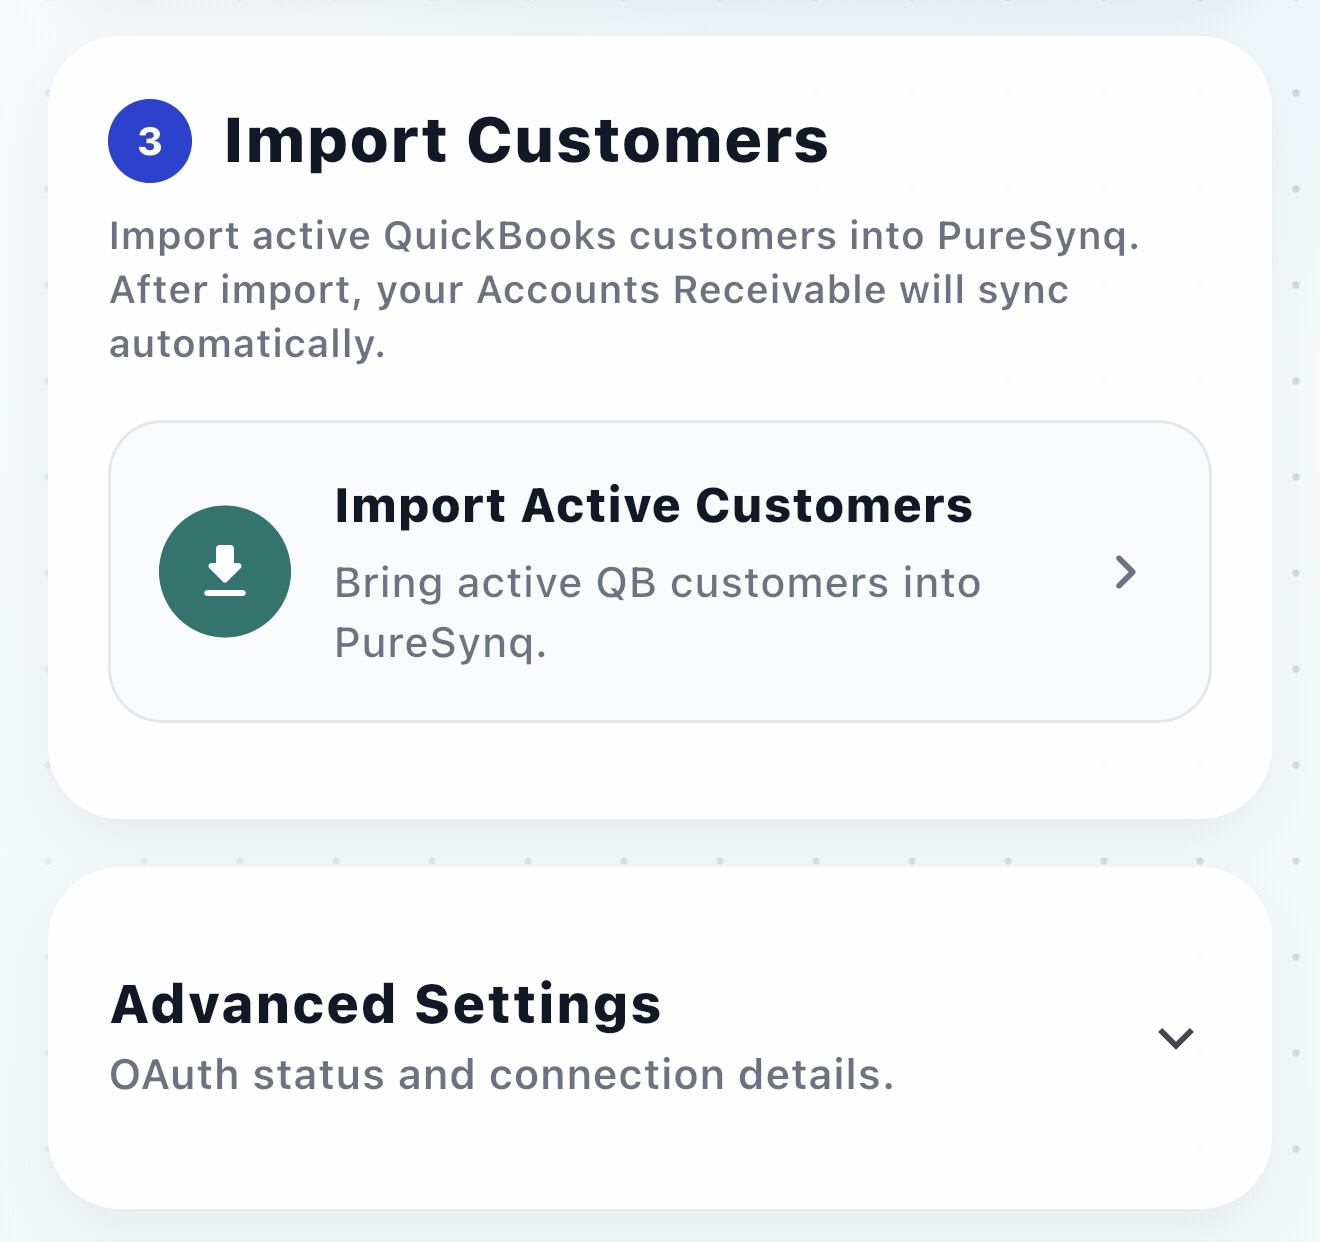
Tap Import Active Customers. PureSynq brings your active QuickBooks customers over — and after the import, Accounts Receivable syncs automatically.
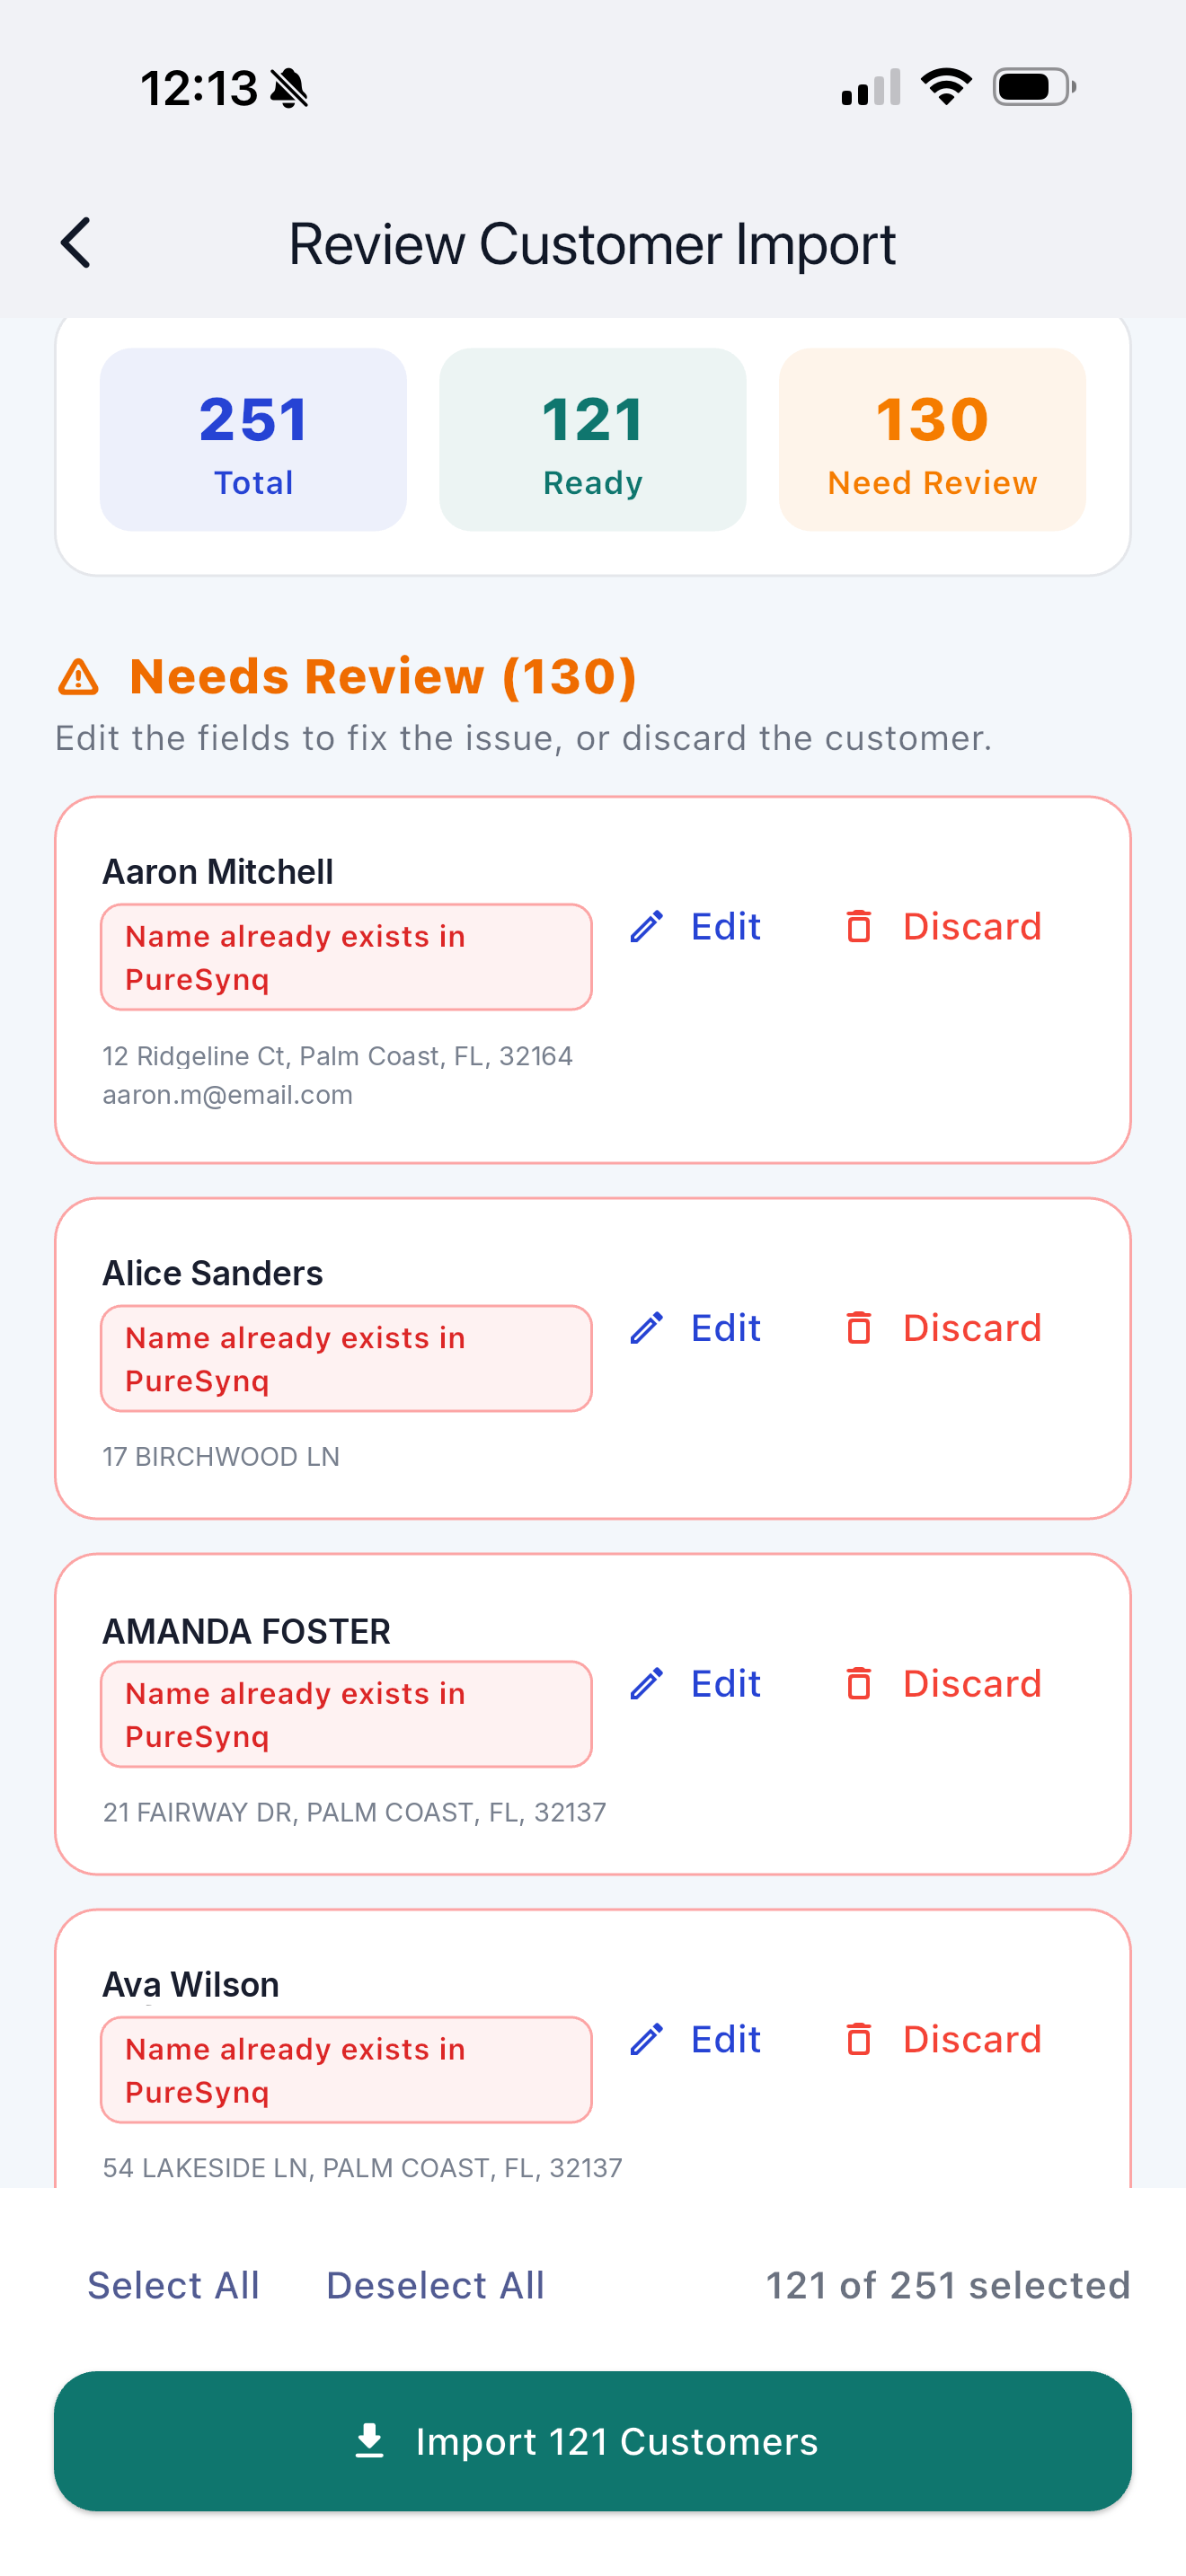
PureSynq checks every customer before importing: the ones with complete info are Ready; the ones missing required fields land in Needs Review, where you can fix the fields inline or discard them. When your list looks right, tap Import — done.
PureSynq works with your QuickBooks — not instead of it.
Get early access